It’s been a good while since I’ve done a Learning to Fly post. Since the last time, I’ve completed my first biennial flight review, which is a mandatory mini-checkride done every two years with a flight instructor, that’s designed to verify that a pilot has properly maintained both their flying skills and regulatory knowledge.
I’ve been doing a ton of local flying around Puget Sound, plus a few flights over the mountains to central Washington state, all via rented aircraft from Galvin Flying.
Because of the Pacific Northwest’s consistently lousy winter weather, with very low clouds, rain, and low visibility, it had been a couple months since my last flight. So I booked some time with a trusted CFI and got lucky with a nice weather window, and off we went to do some practice.
I honestly miss the structure of flight training. You could expect to be constantly challenged, and asked to randomly perform flight maneuvers or emergency procedures. There are still plenty of challenges when flying on your own, but you soon settle into comfortable routines.
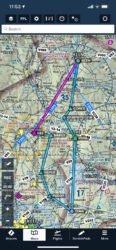
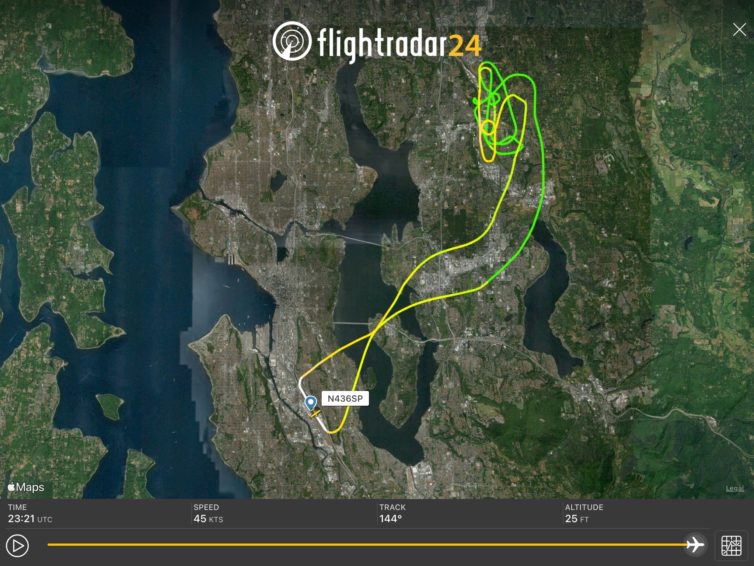
Our flight track from Flightradar24 – the first one is our pattern work, the second is the entire flight
Our training flight first consisted of three laps around the traffic pattern at Seattle’s Boeing Field doing touch-and-go landings, then we exited the pattern and flew to one of our local practice areas, the one we refer to as northeast practice, as it lies to the northeast of BFI. We also have west practice, which is across Puget Sound and east of the Bremerton airport, and southeast practice, which is, perhaps unsurprisingly, southeast of BFI and east of Auburn airport.
A lot of my own flying has been to the southwest over to Tacoma Narrows Airport, or northwest along the Olympic Peninsula to Jefferson County Airport in Port Townsend, so we went northeast for something of a change, plus the transit time is the shortest of the three training areas.
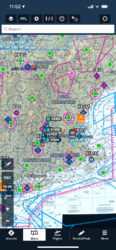
Traffic is always a concern when flying in congested airspace; going out on the first good afternoon following a spell of bad weather always means there is plenty of traffic to keep an eye on
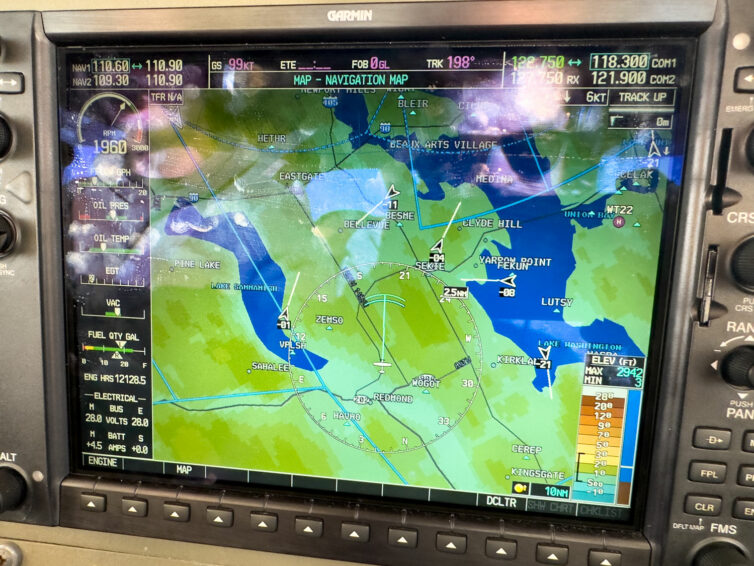
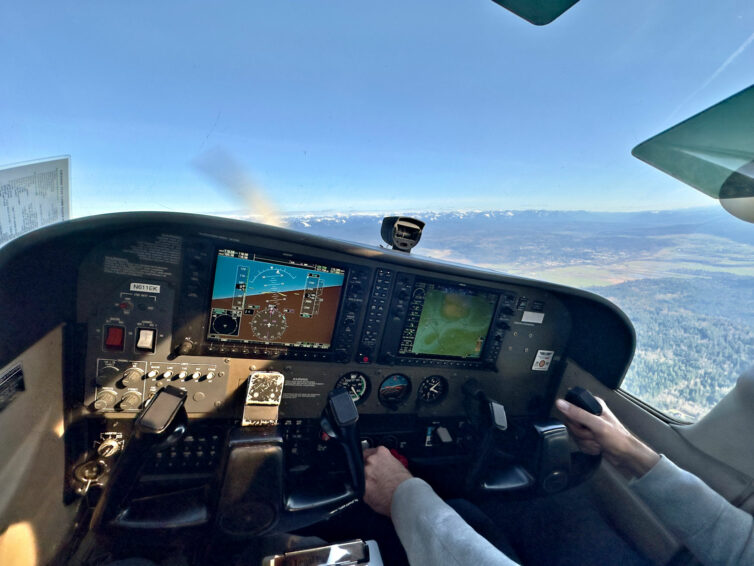
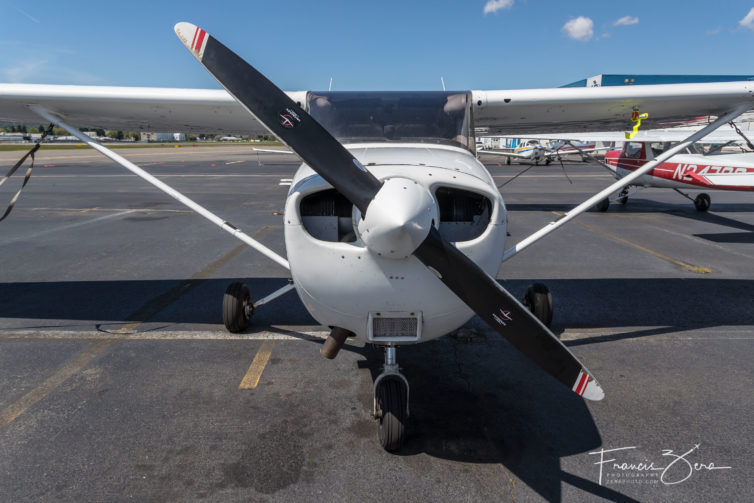
The Cessna 172 we flew that day was equipped with a Garmin G1000 instrumentation and navigation system, which includes traffic. The arrows on the screen above represent aircraft in the area as we were leaving the practice area and descending to stay well beneath SEA’s overhead Bravo airspace when we were returning to BFI. The extended line from each arrow shows direction of travel, and the numbers indicate the altitude above or below your own; super handy info to augment what you’re seeing out the windshield.
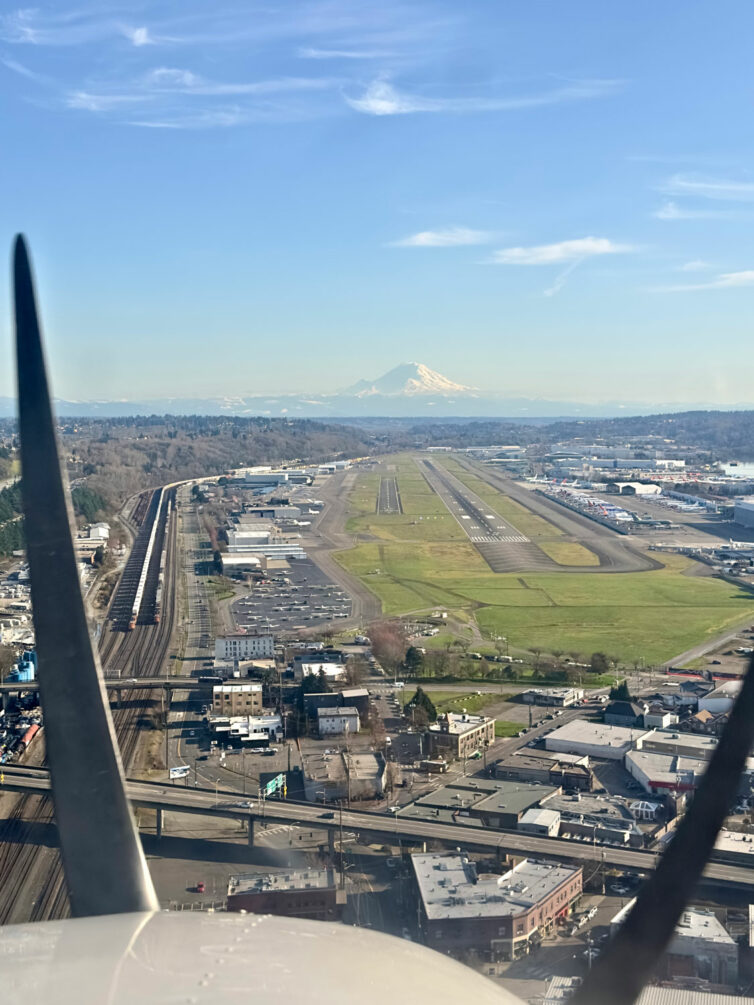
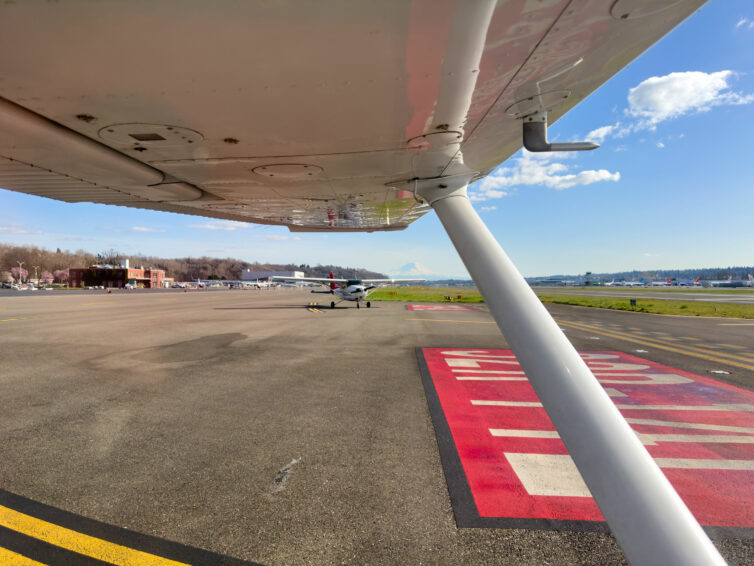
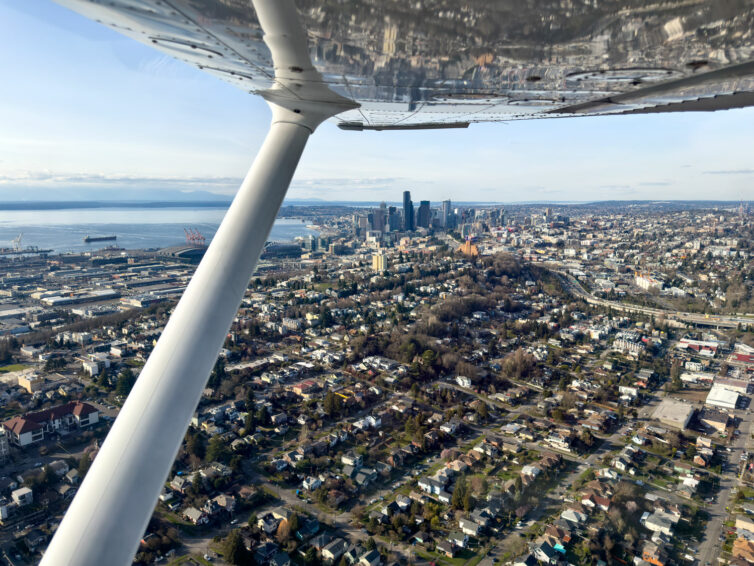
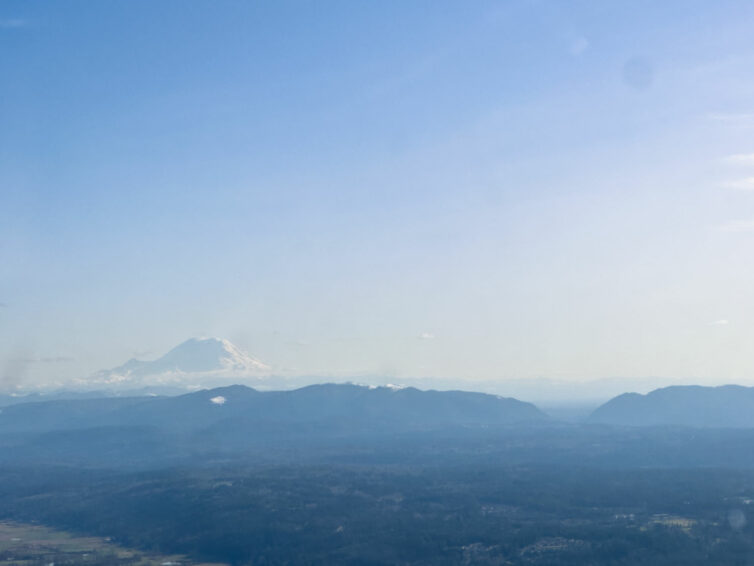
Sitting at the hold-short line, waiting for takeoff clearance. Photo by Adam KephartDowntown Seattle and Puget Sound. Photo by Adam KephartMount Rainier makes an excellent reference point for doing maneuvers over the northeast practice area
There was nothing crazy or groundbreaking about the flight. We did some touch-and-go landings, then went out to the practice area and did a couple of stalls (one power-off approach to landing stall, and one power-on departure stall), and then headed back.
Adam the CFI took the controls so I could grab a few photos
It’s focused practice flights such as these that keeps you safe as a pilot, and keeps your basic proficiency levels up to standard. I’ll go out again with Adam this spring to do some simulated emergencies to keep those skills sharp, too.
And I’ll leave you with one more photo of one of my favorite views ever. More soon — summer is coming.
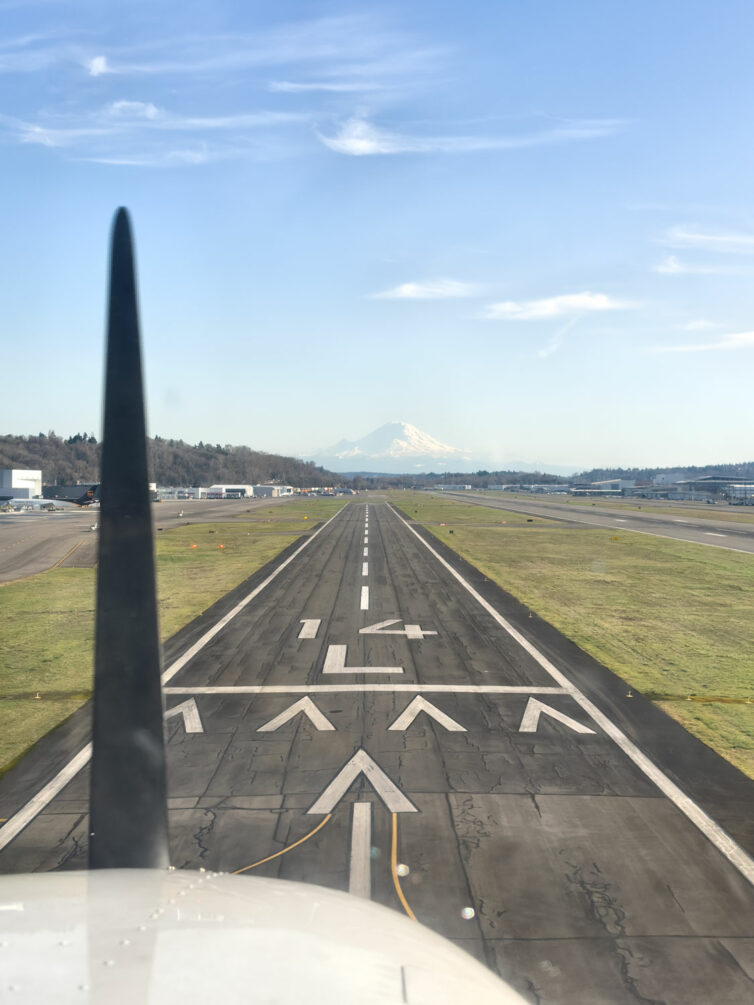
Just about to touch down on 14L at the end of the flight. Photo by Adam Kephart.
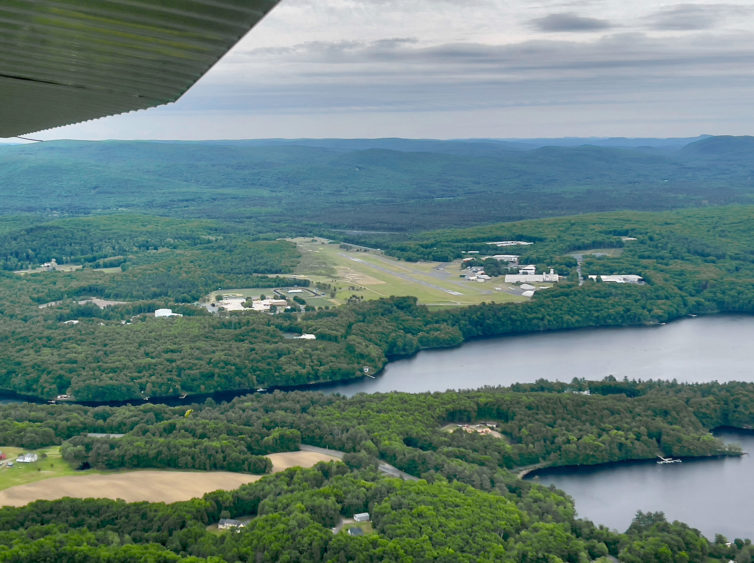
0B5, aka Turners Falls Municipal Airport in Turners Falls, Mass. This is the airport where my AvGeek obsession first took flight, and I finally got to land and take off there this month. – Photo: Katie Bailey
My obsession with airplanes is directly attributable to a very loving grandmother’s attempts to settle down two very rambunctious young brothers. She’d drive us to nearby Turners Falls Municipal Airport to get ice cream and watch planes carrying parachutists from the local skydiving club while sitting on the hood of her beige 1969 VW Beetle. The high school I attended is located adjacent to the airport as well.
So, this spring, nearly 50 years later, with my relatively new pilot certificate in hand, I traveled back home and rented a Cessna 172SP from Monadnock Aviation in Keene, NH. Standard rental restrictions, such as a requirement for multiple checkout flights and having a dedicated rental insurance policy, made it easier to simply ask the folks at Monadnock to assign me a flight instructor to fly along on the trip to negate the need for the checkouts.
The detail view of our official route, which was roughly 100 nautical miles and took about 90 minutes including stopping at KORE and 0B5. Foreflight screenshot
KEEN airport in Keene, New Hampshire. Katie Bailey photo
This is a zoomed-out view for context. Foreflight screenshot. Foreflight screenshot
I’d planned out the route in advance, so I was well prepared for the flight. We’d start and end at Keene airport (KEEN), fly south over the Quabbin Reservoir in central Massachusetts, land at Orange Municipal Airport (KORE), fly northwest to my collegiate alma mater (University of Massachusetts Amherst), land at Turners Falls Municipal (0B5), and fly back to KEEN.
It was a pleasant day, with a very high overcast, light winds, and smooth air. I’d never flown over this area in a small plane, although I’d seen it from 20,000+ feet out the windows of commercial jetliners plenty of times flying home for visits. Trust me when I tell you the views from 3,500 feet are much better.
After a year and a half of concerted effort, I’ve finally completed my initial training and earned my private pilot certificate in early November. It’s a great feeling!
For those who’ve been following along on my adventures at Galvin Flying, it’s been a long process of successes and setbacks, many of which were weather related because I live in the Pacific Northwest, where the local joke says that it only rains once a year it starts raining in late October and stops raining on July 5 (it always seems to rain on July 4).
In case you ever wondered what the track of a checkride looks like, here you go. Screen capture courtesy FlightRadar24
Anyway, I did several mock checkrides in the weeks leading up to the actual FAA one, and had to complete Galvin’s end-of-course checkride before that. The end-of-course checks are designed to be more difficult than the actual checkride to ensure that pilot candidates are as prepared as possible.
The FAA examiner, also known as a designated pilot examiner or DPE, selects from a long list of information and flight maneuvers for the actual checkride known as the Airman Certification Standards. The check airman who oversees the end-of-course checks runs through the entire list to be sure you’re ready.
The business end of a Cessna 172, the type of plane I’ll be training in
Yep. I’m finally doing it.
After close to a decade of talking about taking flying lessons, and after a couple of false starts, I’ve plunked down my money and started ground school last month with Galvin Flying at King County International Airport, aka Boeing Field, aka BFI, in Seattle.
Flying is both a spendy and time-intensive process. I’ve taken a number of introductory flight lessons, and at one point I actually started flight training with a private instructor and self-guided ground school (that’s the experience that made me realize a formal program would be better for me). I’ve also ridden along with several friends and their instructors on their own training flights.
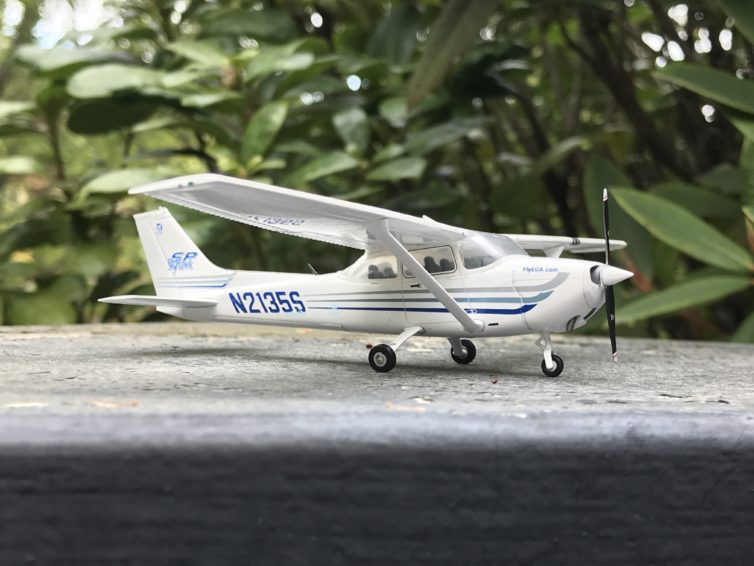
Of course I needed a model C172 to help with training
Anyway, here I am, about halfway through ground school. Now, as JL has already told you, formal ground school is optional, as there are many legit self-study options available that will prepare you for the FAA written exam. Key to any learning endeavor – especially one for folks for whom school of any kind is a couple of decades in the past – is knowing your learning style preferences.
From experience, I know that my most effective learning style is a combination of books and a human instructor, hence my choice of classroom-style ground school. Other folks might prefer videos, still others might choose a self-paced pre-packaged program; all those options are available.
Student pilot requirements get their own chapter in the FAR/AIM, which is the combined set of Federal Aviation Regulations (FAR) and the Aeronautical Information Manual (AIM). It’s the bible for flying in the U.S. I’m here to tell you that it definitely contains lots more rules and regulations than the real Bible.
Odds are pretty good that you have seen a little Cessna 172 high above you at the beach hauling an advertisement banner in tow. But have you ever wondered how exactly the process of attaching that banner to the aircraft works? Does the pilot just take off with the banner dragging down the runway? Is the banner deployed at some point in flight? Actually, the answer is way cooler than you would ever think.
Sammy1Mason recently posted a great video that breaks down the awesome procedure of attaching a banner to an aircraft. The process starts with the aircraft already in flight, and the banner waiting for it on the ground. The banner is attached to a cable which is suspended by two vertical poles parallel to the runway.
To pick up the banner, the pilot must “dive” towards the poles in pretty dramatic fashion. Just before snagging the cable, the pilot must then pitch up to reduce speed as the banner is dragged into the air. Once everything is hooked up, the banner trails the aircraft by about 300 feet. Attaching the banner may not be as difficult as snagging the arresting cable on an aircraft carrier, but it sure looks like it takes some time to master.
While the process to attach the banner to the aircraft is pretty awesome, the process to get it back on the ground is pretty simple. The pilot lines up with his intended target and releases it, hoping the wind doesn’t force it too much off course.